The first time it happens, you don’t see it coming. You hook up to the campground spigot, turn the water on, and a few days later you notice a slow drip under the kitchen sink, or a fitting behind the shower has cracked, or the toilet valve won’t fully shut off anymore. Nothing dramatic. No burst pipe flooding the floor. Just small, expensive damage that crept in quietly because of one thing: the water pressure coming out of that spigot was higher than your RV’s plumbing was ever built to handle.
Campground and city water systems aren’t designed around what’s safe for an RV. They’re designed to deliver enough pressure for a house, sometimes 80, 100, even 150 PSI depending on the park and how close you are to the pump station. Your RV’s plumbing, on the other hand, is built around what its onboard water pump produces, which is typically in the 40–50 PSI range, occasionally up to 60 PSI on larger pumps. That gap is exactly why a water pressure regulator isn’t an optional accessory. It’s the cheapest insurance policy your plumbing system has.
Why RV Plumbing Can’t Handle City Pressure
It’s not the PEX tubing that fails first. Most PEX lines used in RV construction can technically handle pressure well beyond what any campground will throw at you. The weak points are everywhere else: the plastic fittings, the compression connectors, the faucet cartridges, the toilet valve, the water heater inlet. These components are engineered around the assumption that your onboard pump — not a municipal water main — is what’s pushing water through them.
When you connect directly to a high-pressure spigot without a regulator, you’re asking those parts to hold back pressure they were never rated for, continuously, for as long as you’re hooked up. Sometimes that means an immediate leak. More often it means a slow, cumulative stress that shows up as a cracked fitting three trips later, usually when you’re not around to catch it early. A pinhole leak inside a wall or under a slide-out can go unnoticed for days, and by the time you see water stains, you’re often looking at a repair bill that dwarfs the cost of the part that would have prevented it.
What PSI Should You Actually Run?
Most RV plumbing is happiest in the 40–50 PSI range, and most experts treat 60 PSI as a hard ceiling you shouldn’t cross even briefly. Older rigs, or ones with plastic fittings throughout, do better staying closer to the low end of that range. There’s no harm in running your system a little conservative here — you won’t notice a meaningful difference in shower pressure between 45 and 55 PSI, but you’ll absolutely notice the difference in how long your fittings last.
The problem is you have no way of knowing what a given spigot is actually putting out until you test it, and testing it every single time you hook up isn’t realistic. That’s the whole job a regulator does: it takes whatever pressure is coming in and knocks it down to a safe, steady output, automatically, every time.
Fixed vs. Adjustable Regulators
Not all regulators work the same way, and picking the right style matters more than most people realize.
A fixed regulator, like the Camco Brass Water Pressure Regulator, is built to bring incoming pressure down to a preset safe range and hold it there. There’s nothing to adjust and nothing to get wrong — you thread it onto the spigot, connect your hose, and it does its job in the background for the rest of the trip. If you want the same protection at a lower price point, the plastic version covers the basics, though brass construction tends to hold up better over years of connecting and disconnecting at different campgrounds.
An adjustable regulator, like the Camco Adjustable RV Water Pressure Regulator, gives you a dial to fine-tune the output pressure yourself. This matters more than it sounds like it should if you run a tankless water heater, since many of those units need a minimum flow rate just to ignite, and being able to nudge the pressure up a few PSI within the safe range can be the difference between hot water and a unit that won’t fire. It’s also useful if you’re trying to conserve water at a boondocking-adjacent site with a weak trickle from the tap and want to squeeze out a bit more flow without exceeding safe limits.
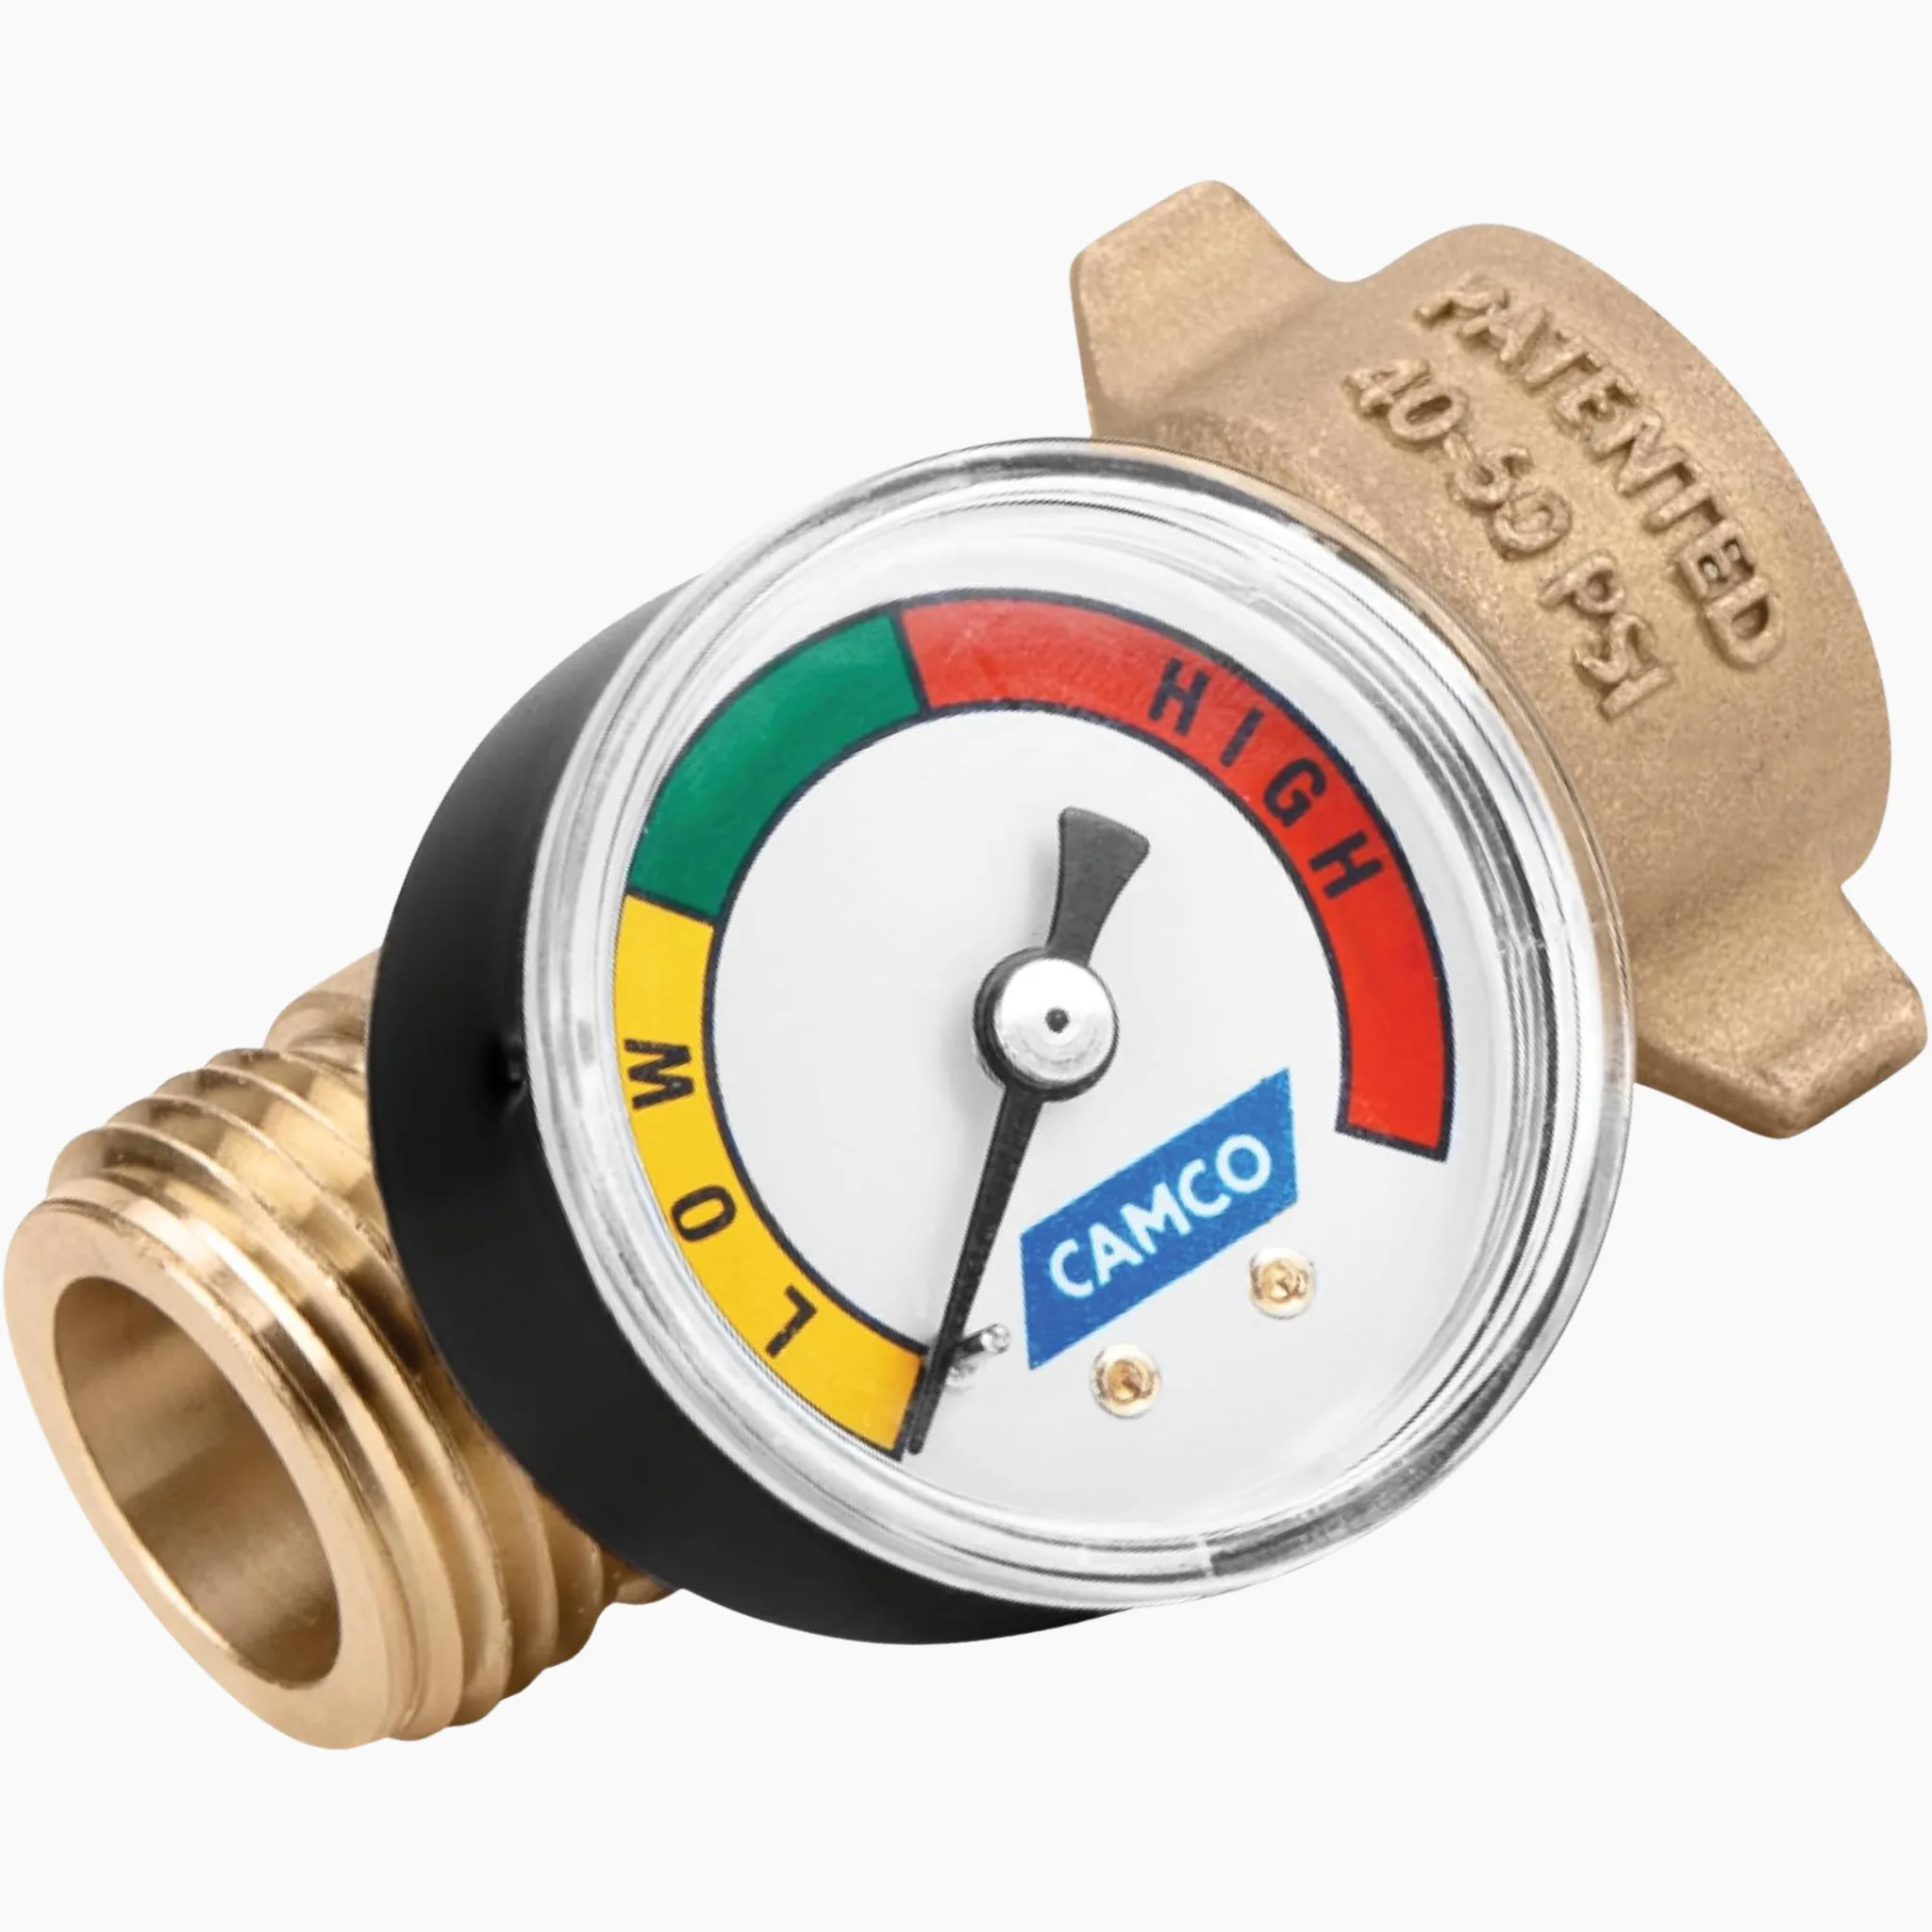
If you’d rather not guess at what’s coming through the line at all, the Camco RV Water Pressure Regulator with Gauge adds a visual readout right on the fitting, so you can see the actual incoming pressure before it ever reaches your fixtures. It’s a small feature, but there’s a real difference between assuming your regulator is doing its job and actually watching the number confirm it.
The Small Parts That Make the Whole Setup Work Better
A regulator solves the pressure problem, but a few other inexpensive parts solve the problems that show up around it.
Hose kinks and sharp bends put ongoing strain on fittings and shorten hose life, especially right at the spigot where the hose often has to make an awkward turn. A brass hose elbow, available in 45° and 90° angles, takes that strain off the connection point instead of the hose itself.
If you need to run water to your RV and still have a spigot free for rinsing gear or filling a jug, a brass hose Y valve splits one water source into two without you having to disconnect and reconnect every time you need the second outlet.
And if you’re tired of wrestling with threaded connections every time you set up or break camp, a quick connect hose adapter lets you snap the hose on and off in seconds, which also means less repeated twisting wear on the threads themselves over a season of regular use.
Where the Regulator Goes in Your Setup
The regulator always goes first in the line, threaded directly onto the campground spigot, before any hose reaches your RV. Water should never enter your hose at full, unregulated pressure — the whole point is knocking the pressure down before it travels any further into your system. From there, connect your drinking-water-safe hose from the regulator to your RV’s city water inlet as usual.
If you’re setting up a full hookup from scratch and want everything sorted out in one go rather than piecing it together part by part, a bundled option like the Valterra Aqua Pro Deluxe RV Starter Kit covers both the water and sewer connection side, which is worth a look if you’re still building out your setup for the first time.
A Cheap Habit That Pays for Itself
None of this requires much effort once it’s part of your routine. Thread the regulator onto the spigot, connect your hose, and you’re protected for the length of the stay — no monitoring required, no guessing about what that particular campground’s water system is doing that day. Compare that against the cost of a slide-out repair, a cracked water heater inlet, or a faucet cartridge that has to be replaced because it spent a season holding back more pressure than it was ever designed for, and the math isn’t close.
If you don’t already have a regulator in your setup, it’s one of the least expensive upgrades you can make relative to what it protects. And if the one you have doesn’t include a gauge, it might be worth the small step up just so you’re never hooking up on faith.